By Michael Elmore
It’s a weeknight, and you need dinner on the table. One solution: planning. One option is doing your preparation ahead of time, such as making your mirepoix and freezing it for dishes you can make throughout the week. Here, we use the prepared mirepoix to put the dish together on Sunday evening. Come home on Monday, and all one has to do is pop the skillet into the oven.
MIREPOIX
Ingredients:
- 4 onions
- 2 celery stalks
- 2 carrots
Directions:
- Dice each ingredient then toss together. Make more or less of the mixture in the same ration (2 onions to 1 celery to 1 carrot). Use immediately or place in a plastic bag and freeze to use as needed.
Ingredients:
- 2 tbsp vegetable oil
- 1.5 cups mirepoix
- 10 fingerling potatoes, halved
- Juice of one lemon
- Salt
- Paprika
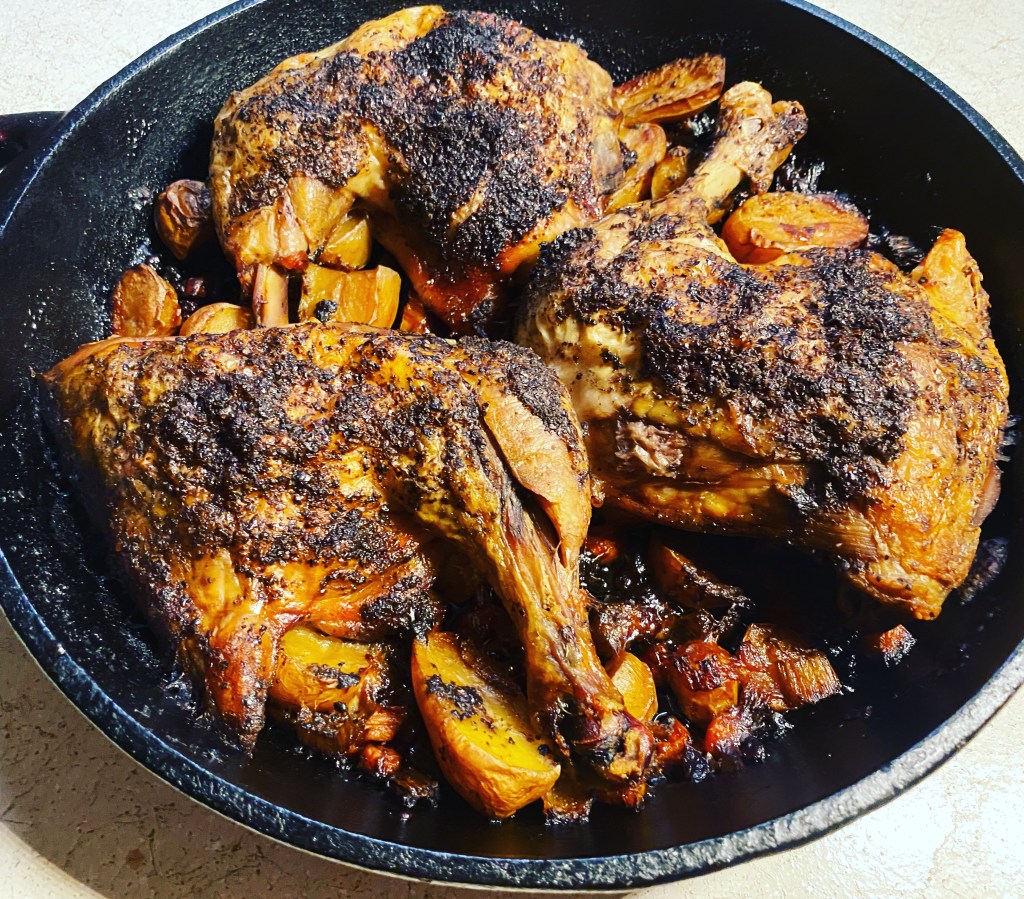
- 3 chicken quarters
- Sumac
Directions – The Night Before:
- In a cast iron skillet, coat the bottom of the pan with the oil. Add the mirepox and spread evenly.
- Toss the potatoes with salt and paprika, then place on top of the mirepoix.
- Season the chicken with salt and sumac (approximately 2 tbsp over all three chicken quarters). Squeeze the lemon over the entire mxiture.
- Place the chicken on top of the potatoes. Cover the skillet with foil then refrigerate.
Directions – Day of Cooking:
- Preheat oven to 375 degrees Fahrenheit and let oven stand at 20 minutes at temperature. While preheating the oven, remove the skillet from the fridge to come to temperature.
- Place skillet in oven and cook for approximately 55-60 minutes or until the chicken reaches an internal temperature of 165 degrees.